I have been slowly getting organised for my Christmas craft market at the end of November. I started by sorting out all my craft stuff and putting away WIPs that are nothing to do with the market. This has really helped me focus on what needs to be done when I open my craft cupboard.
Meet the newest addition to my Christmas decoration range....
.........'Olive' the Owl. I really fancied doing something non-christmassy and a bit cutesy so 'Olive' was born. I know the whole Owl and woodland thing has been done but I am still deep in my 'Woodland' phase. Next I am whipping up some mushroom decorations to match the theme.
Hope your Christmas stitching is going well
30 September 2012
24 September 2012
Vintage Christmas bauble pattern
There is some serious procrastination going on at my house. So I am supposed to be making 'stuff' for my Christmas craft fair and what I am I doing......completing half finished stitching patterns which I sell as pdfs (and obvioulsy won't be featuring at the fair) and giving my Etsy shop a makeover.
Oh well it all needed to be done but perhaps at a later date! I have at least made a few lists and cut a couple of things out...hmmmmm...I work well under pressure.
Anyway if you fancy stitching a retro bauble you can find the pattern here.
22 September 2012
More Bambi anyone?
Yes the Bambi obsession continues...
I have just completed two deer (and dear!) cross stitch/needlepoint patterns to list in my Cupcake Cutie Etsy store.
First there is you guessed it 'Bambi'....
and followed closely by 'Christmas Bambi'.....
They are inspired by vintage Christmas card images and would be perfect stitched onto stockings or framed in hoops. Stitched onto 14" aida 'Bambi' fits a 4" hoop and 'Christmas Bambi' a 6" hoop.
Be the first person to leave a comment and I will email your choice of either 'Bambi' or 'Christmas Bambi' for free!
I have just completed two deer (and dear!) cross stitch/needlepoint patterns to list in my Cupcake Cutie Etsy store.
First there is you guessed it 'Bambi'....
and followed closely by 'Christmas Bambi'.....
They are inspired by vintage Christmas card images and would be perfect stitched onto stockings or framed in hoops. Stitched onto 14" aida 'Bambi' fits a 4" hoop and 'Christmas Bambi' a 6" hoop.
Be the first person to leave a comment and I will email your choice of either 'Bambi' or 'Christmas Bambi' for free!
21 September 2012
Getting ready for a Christmas Craft Market. Part 1
Yay for me....I've got a table at the Great Christmas craft market!
I love going to craft markets and it has been well over a year since I have been to one.
Now after the initial excitement the panic has set in! 10 weeks to get myself sorted sounds like a lot of time but not when you have 2 kids to keep fed, entertained and out of trouble.
So I am approaching this venture in a very sensible and organised manner (for once!). So bear with me as this post is really me thinking out loud.
First up I pulled out all Cupcake Cutie stock left over from previous markets to see what I had...
This is just some of what I found so I think it is a good starting point. Now I don't really want to use all of this as I quite like to have some kind of theme that ties everything together and I like to have at least 5 of every item as it displays well. So everything I have only one of is staying at home, unless I particularly like it and want to make more.
Being a Christmas market I definitely want to focus on my felt decorations....
These gingerbread houses have been my best sellers for a couple of years so they are keepers. I really fancy making a pink candy version of the 3D house so that is on my consideration list.
I also have a few needlebooks and pincushions left over. Not sure about including these or not. The square needlebooks (shown in the main picture) have always been popular but to be honest I am a bit bored of making them so if my heart is not in it they won't turn out well. I think the hedgehog needlebooks I will take as I already have 5 of them and this hedgehog of mine seems to appear in all my items so it keeps the theme running.
Mr Gingerbread Man....Yes, he is a big seller so I will definitely have to make at least 10 of him.
I think I will do some slightly different version though, change the colour of the hearts and frills just to add variety. By the way if you want to make Mr Gingerbread Man for yourself you can find the free pattern and tutorial here.
Right so these are my first thoughts and I need to start writing lists of what definitely needs to be made and then I can start the fun part....ordering supplies!!!!
Stay tuned for Part 2 of my Christmas Craft Market preparation. If you have any tips or opinions on what I should make I would love to hear them.
Can I leave you with this question......Do you like sale/bargain bins at a craft market or do you think they detract from the 'good stuff'?
I love going to craft markets and it has been well over a year since I have been to one.
Now after the initial excitement the panic has set in! 10 weeks to get myself sorted sounds like a lot of time but not when you have 2 kids to keep fed, entertained and out of trouble.
So I am approaching this venture in a very sensible and organised manner (for once!). So bear with me as this post is really me thinking out loud.
First up I pulled out all Cupcake Cutie stock left over from previous markets to see what I had...
This is just some of what I found so I think it is a good starting point. Now I don't really want to use all of this as I quite like to have some kind of theme that ties everything together and I like to have at least 5 of every item as it displays well. So everything I have only one of is staying at home, unless I particularly like it and want to make more.
Being a Christmas market I definitely want to focus on my felt decorations....
These gingerbread houses have been my best sellers for a couple of years so they are keepers. I really fancy making a pink candy version of the 3D house so that is on my consideration list.
I also have a few needlebooks and pincushions left over. Not sure about including these or not. The square needlebooks (shown in the main picture) have always been popular but to be honest I am a bit bored of making them so if my heart is not in it they won't turn out well. I think the hedgehog needlebooks I will take as I already have 5 of them and this hedgehog of mine seems to appear in all my items so it keeps the theme running.
Mr Gingerbread Man....Yes, he is a big seller so I will definitely have to make at least 10 of him.
I think I will do some slightly different version though, change the colour of the hearts and frills just to add variety. By the way if you want to make Mr Gingerbread Man for yourself you can find the free pattern and tutorial here.
Right so these are my first thoughts and I need to start writing lists of what definitely needs to be made and then I can start the fun part....ordering supplies!!!!
Stay tuned for Part 2 of my Christmas Craft Market preparation. If you have any tips or opinions on what I should make I would love to hear them.
Can I leave you with this question......Do you like sale/bargain bins at a craft market or do you think they detract from the 'good stuff'?
17 September 2012
Free Gingermelon doll pattern
I have serious craft envy when it comes to Gingermelon Dolls. Shelly creates the most devine, exquisite softie doll patterns, I love all of them but particularly the Halloween ones, especially the mummy.
I follow the Gingermelon blog and in Shelly's latest post she has a free doll pattern you can download.

Just too cute! So take advantage of this wonderful offer. I am going to download and print the pattern and add it to the 'When both kids are at school I will have time to make all of these things' folder.
Thank you Shelly for sharing one of your gorgeous patterns!
I follow the Gingermelon blog and in Shelly's latest post she has a free doll pattern you can download.

Just too cute! So take advantage of this wonderful offer. I am going to download and print the pattern and add it to the 'When both kids are at school I will have time to make all of these things' folder.
Thank you Shelly for sharing one of your gorgeous patterns!
Tutorial: Iron on transfer Christmas decoration
Time for a tutorial...hopefully it will inspire you to make use of your forgotten transfers.
This ornament is inspired by my recent purchase of a vintage Xmas transfer book (refer previous post!). I thought this little guy was adorable and the perfect size for a felt decoration for the tree.
Being an old book first I tested the sample transfers (not something you will often find me doing!) onto different coloured felts to see if it which colour it would show up on. I opted for this caramel as it was sort of a 'deer' colour.
TIPS: With vintage iron on transfers you will probably only be able to get one image from each transfer so make sure you make good use of it! Use a sheet of baking paper between transfer and iron if you are using acrylic felt otherwise it goes all hard.
If your piece of felt is big enough pop it into a hoop to make it easier to stitch ......
...and then get started using any colour and stitch that takes your fancy.
Here is Rudolph in all his glory.
Remove your finished design from the hoop (if you have used one) and here I have drawn a circle around the image using fading fabric marker to use as a guide for cutting.
I could have just left it round and added a back to complete the ornamnt but I decided I wanted another layer of colour.
I cut a free hand scalloped edge around my design and then lay in on different colour felt until I decided bright red was the winner.
Find something round to draw around. This drinking glass was the perfect size. I traced out cut two circles.
Next I pinned Rudolph on and marked where my French knots were to go. Running stitch would be just as cute if you are not a fan of knots!
All knotted up and ready to go!
Next choose your ribbon for the hanging loop and cut to size then start blanket stitcing the two red circles together remembering to catch your hanging loop with the stitching to keep it in place. Whip stitch would work just as well too.
And there you have it a new hand made decoration to add to the Christmas tree this year.
This project has definitely got me into the Christmas crafting mood and I think their will be a distinct deer theme this year as well as gingerbread houses because I just love them too.
Happy Xmas crafting!
This ornament is inspired by my recent purchase of a vintage Xmas transfer book (refer previous post!). I thought this little guy was adorable and the perfect size for a felt decoration for the tree.
Being an old book first I tested the sample transfers (not something you will often find me doing!) onto different coloured felts to see if it which colour it would show up on. I opted for this caramel as it was sort of a 'deer' colour.
TIPS: With vintage iron on transfers you will probably only be able to get one image from each transfer so make sure you make good use of it! Use a sheet of baking paper between transfer and iron if you are using acrylic felt otherwise it goes all hard.
If your piece of felt is big enough pop it into a hoop to make it easier to stitch ......
...and then get started using any colour and stitch that takes your fancy.
Here is Rudolph in all his glory.
Remove your finished design from the hoop (if you have used one) and here I have drawn a circle around the image using fading fabric marker to use as a guide for cutting.
I could have just left it round and added a back to complete the ornamnt but I decided I wanted another layer of colour.
I cut a free hand scalloped edge around my design and then lay in on different colour felt until I decided bright red was the winner.
Find something round to draw around. This drinking glass was the perfect size. I traced out cut two circles.
Next I pinned Rudolph on and marked where my French knots were to go. Running stitch would be just as cute if you are not a fan of knots!
All knotted up and ready to go!
Next choose your ribbon for the hanging loop and cut to size then start blanket stitcing the two red circles together remembering to catch your hanging loop with the stitching to keep it in place. Whip stitch would work just as well too.
And there you have it a new hand made decoration to add to the Christmas tree this year.
This project has definitely got me into the Christmas crafting mood and I think their will be a distinct deer theme this year as well as gingerbread houses because I just love them too.
Happy Xmas crafting!
15 September 2012
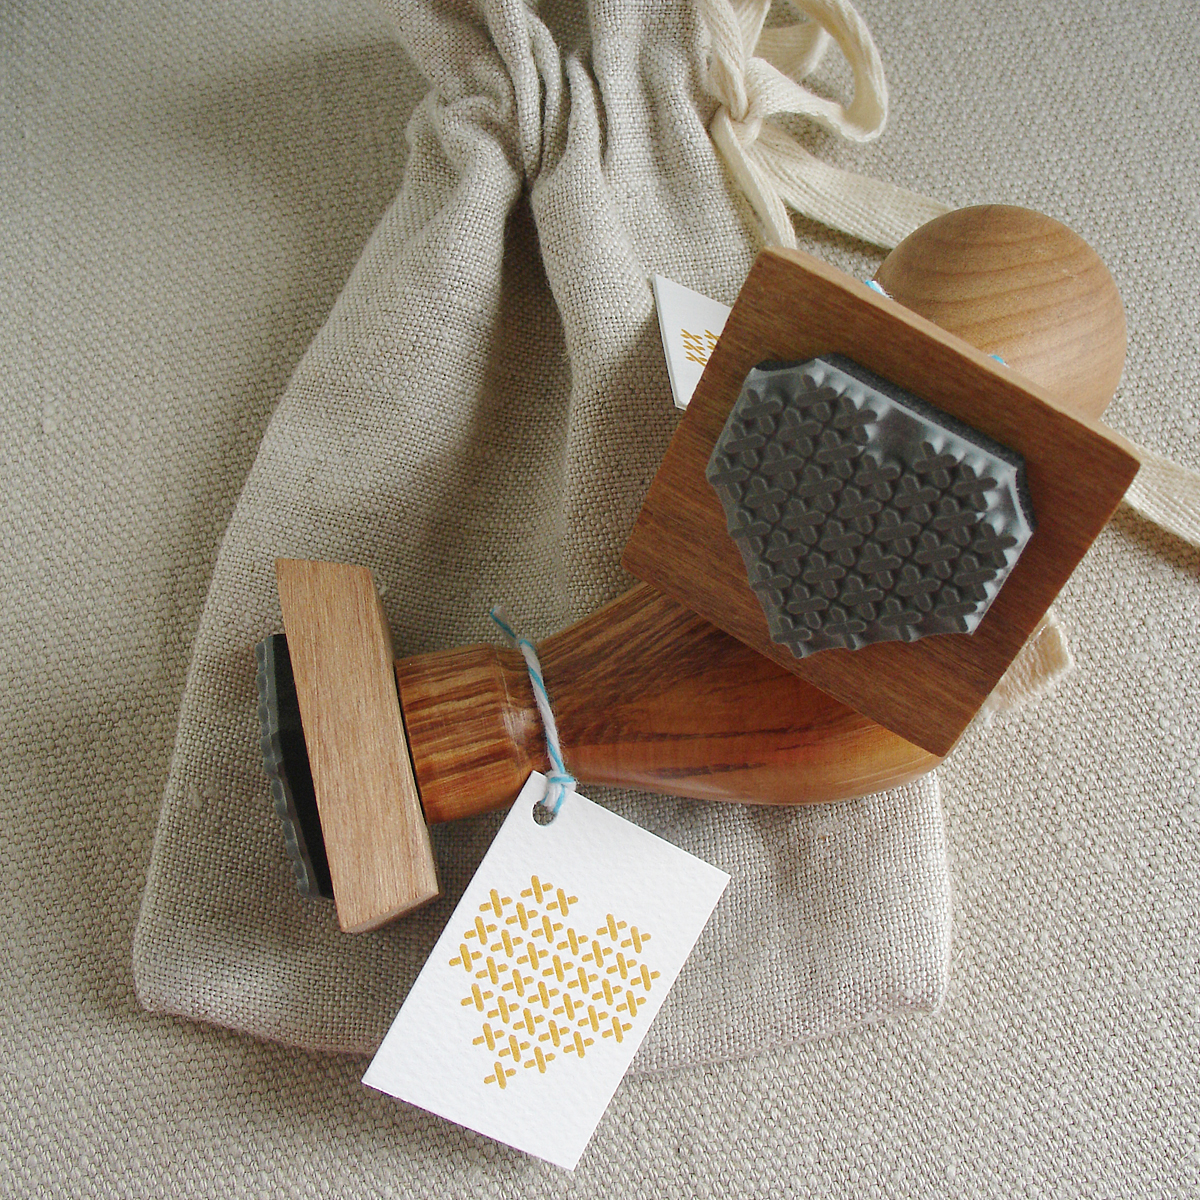
Gorgeous cross stitch stamp
As an avid compulsive stitcher I think this rubber stamp is just devine.....

You can find it in the online shop of Hommage.
Just love it...nothing else to say!
You can find it in the online shop of Hommage.
Just love it...nothing else to say!
Subscribe to:
Posts (Atom)