The Cupcake Cutie Stitch-a-long continues. In Part 3 we start sewing....yay!
Missed Part 1? Find it HERE
Grab your pattern and turn to page three. We are completing Step 1 and 2 which will make the ears.
You would have already cut out all your felt pieces (if not find part 2
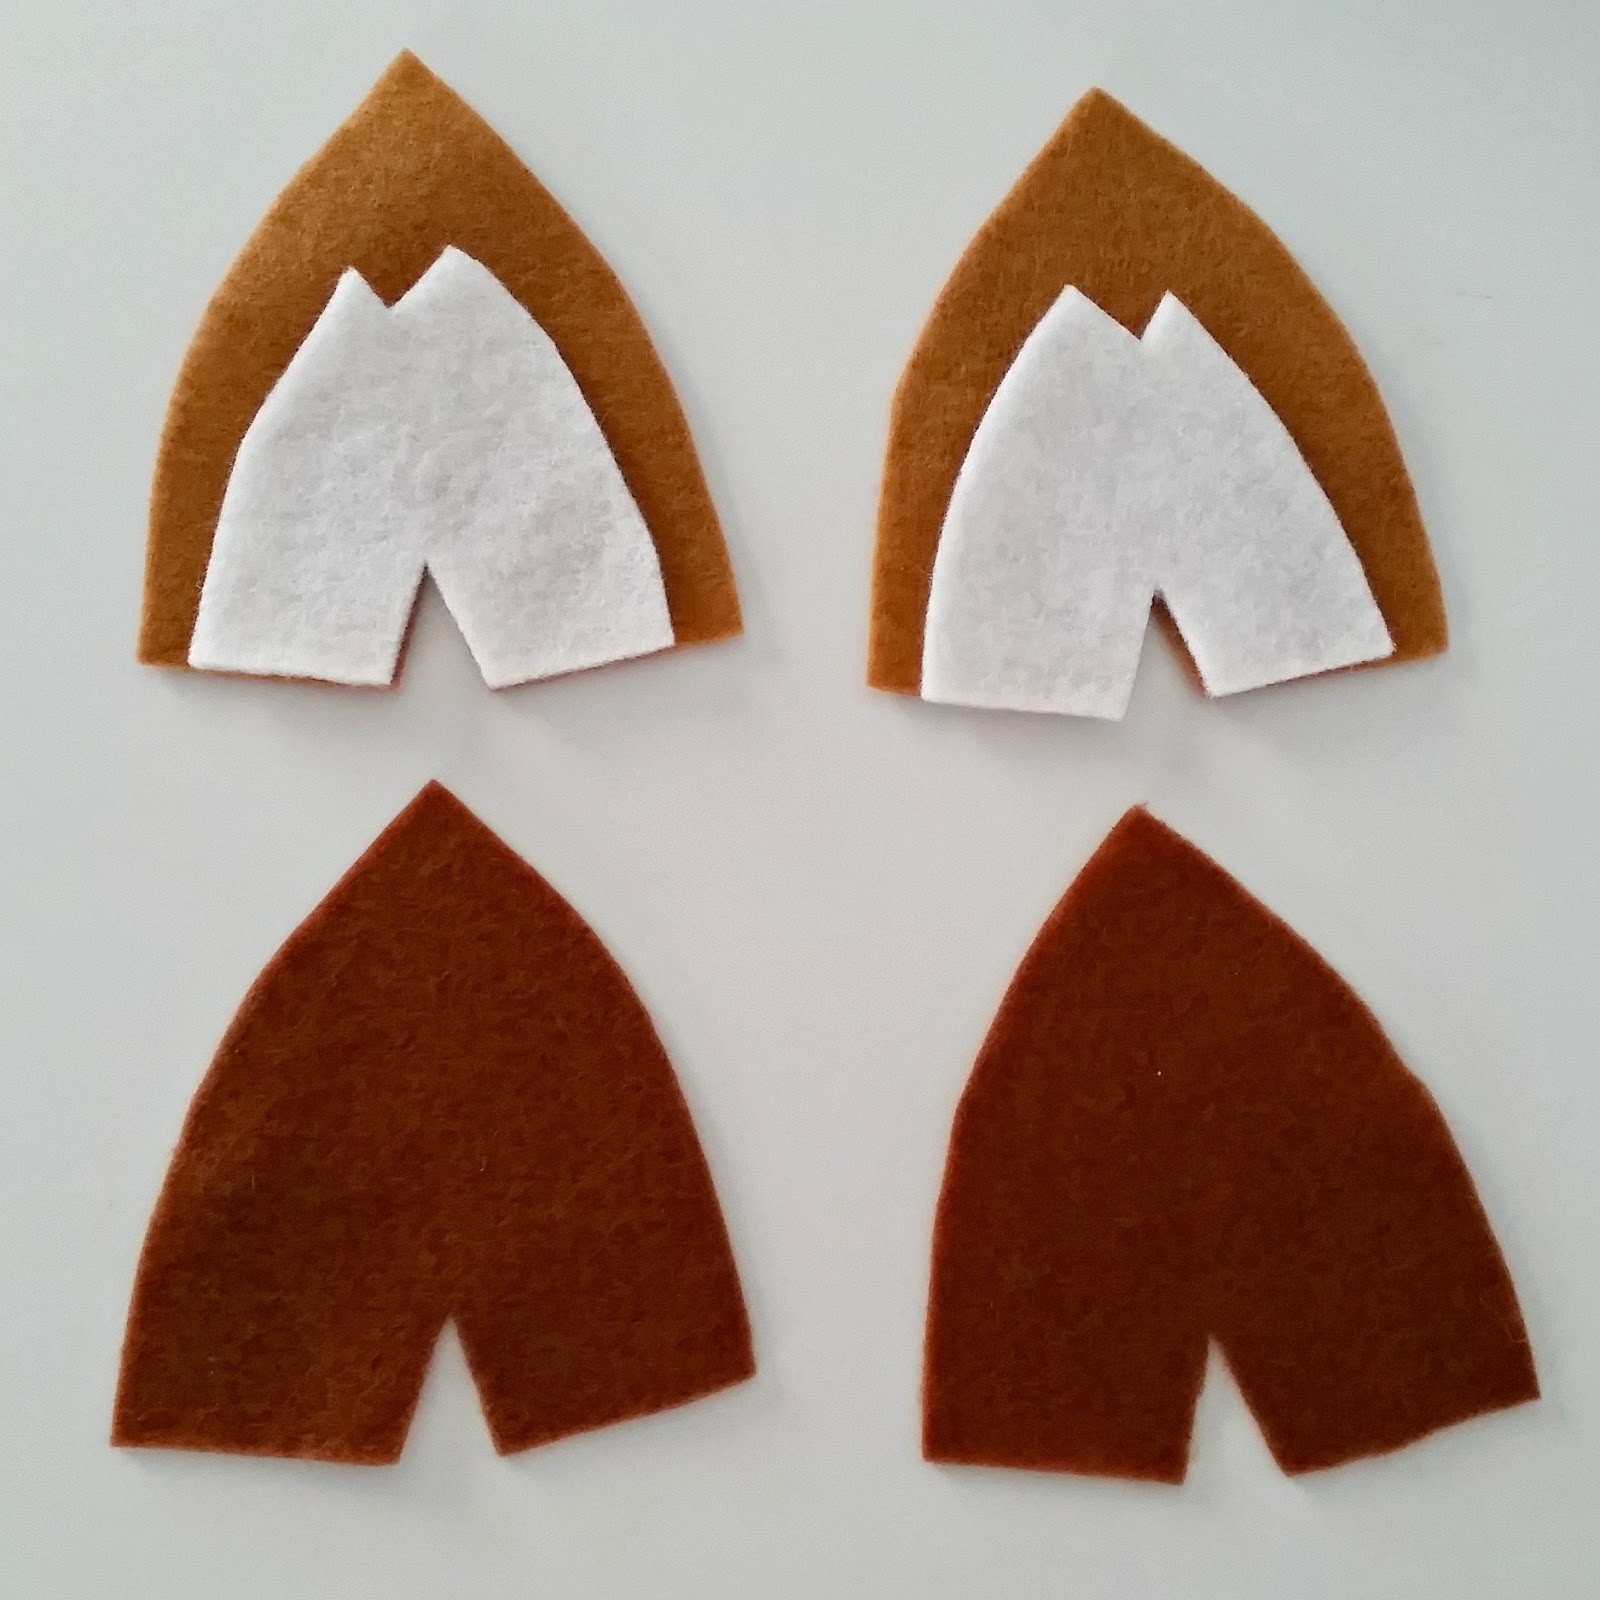
HERE) so gather your 6 ear pieces as shown above.
Lay the white pieces on top of the light brown pieces making sure the white pieces are mirror images of each other.
Then lay these on top of the cinnamon ear pieces.
Pin the ear layers in place. We are going to start stitching on the point where my very un-photogenic finger is pointing!
Thread your needle with 1 x strand of brown embroidery floss or cotton. We are going to be stitching around most of the ear in either whip or blanket stitch. I prefer blanket stitch but you may find whip stitch easier if you are a beginner. There is a handy stitch guide on page ???????of the Fox pattern if you need a reference. Start by inserting your needle between the 2 brown layers as this will hide your knot...
....then keep stitching until...
....you reach the bottom of the inverted 'v'.
Repeat this whole process on the second ear.
Now fold your ear in half and pin. Now we are going to either whip or blanket stitch down this small edge with 1 x strand of thread.
Again you want to hide your knot between the layers and stitch the short edge together.
Then you finished ear will look like this. Stitch along the edge of the other ear and then put the ears aside.
Now onto the eyes....
Sew white eye reflections on using 1 strand of white floss and whip stitch.
Then sew black eyeball on using 1 strand of black floss and whip stitch.
Time for the eyelashes. Using 2 strand of black floss and 2 stitches of back stitch create the first eyelash...
...then bring your needle back up as shown and add another eyelash (using 2 stitches of back stitch) at about a 90 degree angle to the first...
Once you have completed one eye, start on the next one REMEMBERING that it is a mirror image of the first. Now put your eyes aside for a moment.
Take you 2 face pieces and right sides up make them face each other. Take your 2 white neck pieces and position them as shown. You will remember that we placed a pin at the nose point of both pieces so we know which way is up.
Pin in place along the lower edge....
...then using 1 strand of white floss use a running stitch to sew the white piece on following the top curve.
Now time to bring the eyes back...
Grab your face template so you can work out where to position your eyes...
...Sometimes it helps to actually lay the pattern on top of your felt or even cut out the inside of the eyes shape on the pattern piece for perfect placement.
Pin eyes in place. I like to lay the 2 face pieces with right sides together just to double check that the eye pieces are both in the correct place.
The sew the eyes on using 1 strand of light brown floss and whip stitch.
Take the top of the head piece and face it right side up. Fold in half with right sides together...
...and pin.
Then either blanket or whip stitch along this edge using 1 strand of matching floss.
When right side up it will look like above.
Take the back of the head piece and lay it right side down as shown above. Pin.
Whip or blanket stitch in place using 1 strand of matching floss. Open it out and place it right side down....
....and grab the left side of the head as shown above.
Pin the tip of the nose to the tip of the 'top of the head' piece. You can just see the corner of it poking out on the rounded bit of the nose.
Now you are going to pin this point as indicated by my finger above to.....
....this point....
.....so it will look like above.
Now start pinning the top of the head piece around the face piece, easing it as you go to follow the curve.
Place about 4 pins then stop.
Now start pinning at the bottom of the neck (where you placed the second pin) and work your way up until the first side of the face is pinned on.
Then stitch the using 1 x strand of matching thread and whip or blanket stitch.
Now flip your fox over and start pinning the other side of the face on. Start by lining up and pinning the white patches and then carry on pinning around the top as you did for the first side.
Use 1 strand of matching floss and whip or blanket stitch start at the point indicated by my finger and stitch over the top of the head...
....and continue stitching over the tip of the nose, stopping at the white.
Then thread your needle with 1 thread of white floss and continue stitching down the white neckline....
Then re-thread with brown and sew the last little piece of the head together.
Time to start stuffing. Start with small pieces of stuffing and push them right into the point of a the nose. A knitting needle works well to get the stuffing right into the tip. Continue stuffing to round out his face.
If your stitching line is raised as shown above then you need to add more stuffing so....
...it looks more like this smoother line above. When he is fully stuffed flip him over....
....and pin the back flap down.
Using 1 strand of matching floss and either whip or blanket stitch sew 3/4 of the way around.
Add more stuffing and then continue to sew closed.
And then he will look a little like this.
Time for a well deserved sewing break. In the next and final post we will add his face details and ears and attach him to the hoop. CLICK
HERE TO GO TO THE NEXT TUTORIAL.
Happy stitching and if you have any questions please ask.
Kim
xxx