If you are just joining in you get head back to Part 1 HERE.
Ok so grab his nose and pin in place covering the point of his nose as shown.
Before we sew his nose in place it is time to add his smile. Thread your needle with 2 strands of black floss
and hide your knot under his nose.
Here I have drawn on his smile with a fading fabric marker to make it easier. You could use pencil as long as you stitch over it to cover the pencil well.
Use back stitch to add his smile and then hide you finishing knot under his nose again.
Make sure his nose is still in the right position and pin.
Then stitch in place using 1 strand of black floss and either whip or blanket stitch.
On to the ears. Thread your needle with 1 strand of brown floss and attach it to the bottom corner of the ear.
Pin the ear in place.
Here is the positioning from the side.
Pin the second ear on to make sure they look right.
Now hold the ear down and start ladder stitching it onto the head. So make a small stitch on the head as shown then...
...a small stitch on the ear and carry on like this pausing at the seam in the ear to make sure the ear is still in the right spot and then continue.
Repeat this process on the inside of the ear.
Sew the other ear on in the same way and he should look like this.
And a view from the side.
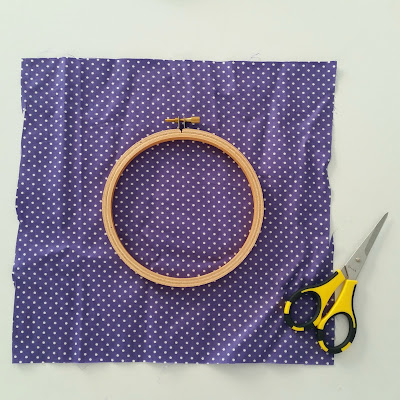
Now it't time to attach Frankie to the hoop. Choose either a 5" or 6" hoop and find some thick card, scissors and a pencil.
place your hoop on the cardboard and trace around the inside edge.
And then cut it out and put to one side.
Grab you chosen backing fabric. As you can see I am not friends with my iron but you could probably iron yours!
Loosen you hoop and stretch the fabric tightly between it. If you have a thin fabric I recommend placing a layer of a plain white fabric underneath your patterned fabric. Do the screw up tight again.
Trim the fabric around the edge of the hoop.
Now place Frankie in round about the centre of the hoop, hold tight to him and the hoop and flip it over...
...and place a pin through the backing fabric and into the back of Frankie's neck too. Flip the hoop back over and make sure he is still in the correct position and then add a lot more pins to hold him securely in place.
It should look a little like this.
Now thread your needle with 2 strands of brown floss and put a giant knot at the end. Then bring your needle up from under the hoop, coming up just in front of the seam of the fox.
You are going to use a ladder stitch (like you did for the ear) so place a stitch through the fox then...
...pass your needle down through the hoop then..
....up through the hoop and make another stitch through the fox, then down through the hoop again.
Continue in this way until you have about 6 stitches and then pull them tight. I find putting a bit of pressure on the fox as I pull seems to help. You need to pull the thread tight after every few stitches otherwise it becomes to difficult and you might end up with loose threads. When you have stitched half way round it gets a bit tricky to reach the back so I just do 1 long stitch at the top of the back of the neck so it looks like this...
Continue ladder stitching around, pulling tight as you go.
I have added my little wooden logo tag here.
Thread you needle with 2 strands of ordinary white machine sewing cotton and place a large knot at the end. Now use a running stitch to start gathering the fabric.
Continue the running stitch all away around, pulling it tight as you go. Once all the way around just trim your thread and let it hang loose - don't knot it.
Now grab your circle of card and lay it over the back...
...and force it into the back of the hoop. You will see the card starts to crease which is fine because it means it will stay in place firmly.
Once in it will look like this. You do need to include the card as it will keep your fox sitting nicely and will stop your fabric sagging.
Now just make sure the screw at the top of your hoop is nice and tight and you are done...
CONGRATULATIONS you did it! Frankie the Fox is complete and ready to be hung on the wall.
I really hope you found this tutorial useful. I will be doing another faux taxidermy stitch-a-long again soon so let me know which pattern you would like to do next, the giraffe, the rhino, the panda.....let me know.
Thank you so much for following along with my first stitch-a-long, as always if you have any questions please let me know.
Kim
xxx


