11 December 2013

Home made Gingerbread House 2013

I am starting a new Christmas tradition for my young family this year...a home made Gingerbread house which will be wrapped up and on display and will be opened (with great ceremony) and devoured on Christmas Eve while watching cheesy Xmas movies...

Now this is my very first attempt at baking and decoration a gingerbread house (I do love a challenge) and I am pretty happy with the result. But I have to share that it was not a smooth ride.
The baking went very well and the decorating started equally well but then I tried to add the roof and well it all turned pear shaped when I tried to adjust the roof at a late stage and the whole thing collasped and the roof parts broke. I very nearly through it across the room but I thought 'no I can fix this'. So I manged to get the sides together and after much pondering and coffee drinking I had a brilliant idea...

I found a tall skinny box, chopped the ends out, covered it in greaseproof paper and squeezed it into a diamond shape and placed it inside the house. I wasn't about to start baking more roof pieces so off to the supermarket to buy pink wafers and chocolate fingers and royal icing mixture my daughter and I went...

I applied liberal amounts of icing to the greasproof insert and between the wafers and fingers and it all stuck together beautifully. Then I just started sticking and eating heaps of candy. I think I gained about a kilo today from all that sugar.


More is more when it comes to decorating...


The base is just a thick piece of cardboard covered in grease proof paper....
 
 
The iced Christmas tree I bought readymade from the supermarket...

And here it is all wrapped in its cellophane waiting for Christmas Eve to come around...

Now the only problem is I have no high shelt to put it on and two kids under 4 and a husband with a sweet tooth...hmmmmmmm I am going to have to be on guard duty I think!

08 December 2013

Free Christmas craft patterns + tutorials

I have pinned so many great FREE Christmas craft patterns and tutorials on Pinterest lately and have been sharing them on my FB page but I thought that I would put them all on one page and share them with you.

First up are these adorable Deer + Fox felt ornaments from Cutesy Crafts...


Then a wonderful felt Santa from Gingermelon (I just adore all of Shelly's designs!)...


Next are these gorgeous fabric houses from the very talented Retro Mama...

Home for the Holidays: free fabric house tutorial by Retro Mama

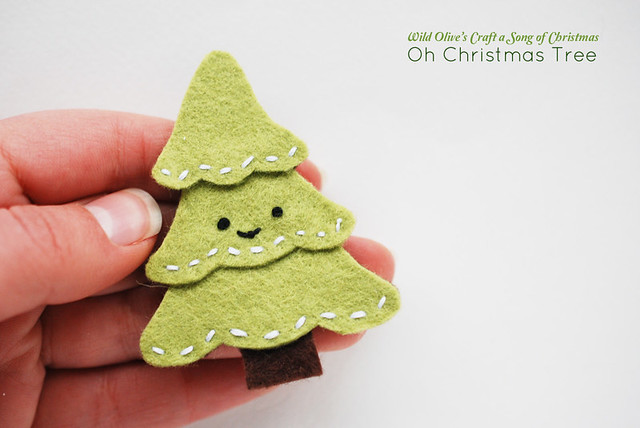
A very cute Kawaii felt Christmas Tree pin from the very inspirational Mollie from Wild Olive ...

O Christmas Tree Felt Pin

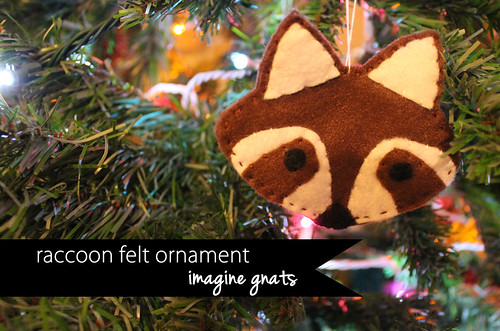
Adorable felt Raccoon hanging ornament from Imagine Gnats...

raccoon felt ornament

And I love this hanging terrarium from My So Called Crafty Life...

DSC 0035 3 599x600 DIY Christmas Hanging Terrariums

And of course my own latest freebie a little Gingerbread house to stitch...


Happy Christmas crafting!


05 December 2013

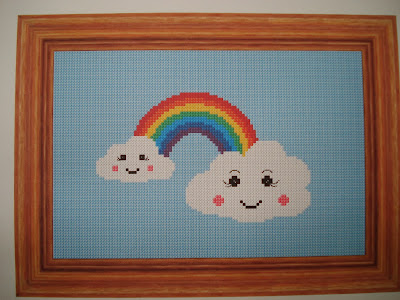
clouds, clouds and a few more clouds + a new pattern!

I have become a little bit obsessed with clouds lately.  I have been making felt cloud pinchushions...

....and little felt cloud brooches...

...for recent Christmas markets. So I thought I needed a cross stitch pattern to match...

'Rainbow + Clouds' (very original title!) is perfect stitched up for a kids bedroom and is cross stitch with a little bit of back stitch so an easy pattern to follow.

You can find 'Rainbow + Clouds' in my Etsy store.

Happy Stitching!

04 December 2013

Triangle Geometric Cushion...making something out of nothing.

I am always squirreling away crafty bits and pieces that I have found at op shops, people have given me or leftovers from other projects and sometimes they all come together to make something wonderful...


For this fabulous cushion I used a piece of rug canvas I bought for 50 cents at the charity shop and acrylic craft wool that I already had from previous projects, and my new  Triangle Geometric pattern.

 
I used two strands of wool at a time and cross stitched the design onto the rug canvas...

...and made the design the same size as the cushion inner I had was recycling.
  
This is vaguely how I made it into a cushion cover...

 
I took a long length of calico and cut in two. Placed the fabric and  triangles right sides together and  sewed up against edge of either edge of completed tapestry with about a half inch seam.


Folded and pinned the edge of each piece of calico...

then sewed the  sides....

Turned the cover inside out and trimmed the sides and cut the corners,...

Turned right side out and stuffed with the inner and there you have it a funky cushion!

03 December 2013

FREE Gingerbread House cross stitch or hama bead pattern

A little freebie to get you into the Christmas spirit...

You can find this cute  (+ FREE) Gingerbread House here in my Craftsy store.

I have also turned the same pattern into a hama bead decoration...

.....Cute!

Feel free to share this pattern with your friends and get everyone in the Christmas crafting mood!

08 October 2013

before + after: From kids t-shirt to cushion

The weather is really warming up in my part of the world so I started going through the kids summer clothes to see if anything still fitted. My daughter (nearly 2) was helping me and she stumbled upon her favourite (like ever!) Minnie Mouse t-shirt which of course was far too small for her but she insisted on trying to put it on and then took it bed that night.

 I thought wouldn't it be nice to turn it into a cushion. It turned out to be a super easy project which I am sure would work for a lot of t-shirts which have a central image.

Here she is wearing it about a year ago...

Here is what I did....

I turned the t-shirt inside out on a flat surface and was lucky enough to see the image clearly so roughly pinned the front to the back around Minnie's face.
 
Then with about an inch gap I followed the shape of the face around using a black marker. You could use a pencil or fading fabric marker too.

Then I sewed around following the inside of the black pen and left a 2 inch gap at the side for stuffing.

Trimmed around it...

I turned it out the right way to make sure I was happy with the shape, then turned it inside out again and did an extra row of stitching to give it a bit of strength. Then turned is right side out, trimmed closer to the stitching and clipped the corners (accidently deleted the photo of this step!), stuffed it with polyfill and ladder stitched it closed.

Instant cushion!
 
My daughter LOVES it and I couldn't get a decent photo of her posing with Minnie because she was too busy giving her new pillow kisses.
 
Here is the cushion on her new big girls bed which is currently a mattress on the floor because she is always falling off it. As you can see Minnie has also made an appearance on the bed linen too!
 
This was honestly a really easy project which took about half an hour and cost nothing but made a wee girl very happy! Give it a go with your childs favourite t-shirt. If you do I would love to see a photo of the result. 

20 September 2013

My new toy: Motex label maker

My daugther starts preschool when she turns 2 at the end of November and I got all excited about buying her a lunchbox, drink bottle and school bag. But not half as excited as I was about ordering my Motex label maker!!!!!


I bought it online from Qwerky Home who sell "fun and beautiful homeware, gifts, furniture and stationery in vibrant shades and lush fabric and quirky designs".

And look at the beautiful way it came packaged...

....with a lovely hand written note and some peas!! Yes peas but more about that in a moment.

I really should have finished putting away my groceries and clearing the bench but of course I couldn't wait and had to rip into it and get labelling...

...it is so much fun to use and so retro. I ordered extra pink and yellow tape and then ended up bying a pink and yellow lunchbox so it is all very co-ordinated!

Then I thought while I already had such a mess I might as well make a label for her bag too. I found some Amy Butler cardstock and randomly chopped some tag shapes and laminated them...
 
... added the name and found some recycled bakers twine....

and there you have it a bag tag...

Now back to the packet of peas...

...which I found very intriguing so followed the link that was 'motexed' on the packet and this is what I found in the FAQs....

What are the pea and spaghetti squash seeds all about?We try to do our bit to lessen our impact on our environment. Sharing some seeds and encouraging some vege growing on your balcony or with children out in the back garden makes us feel good.

How cool is that! We love growing our own vegies so I can't wait to get these planted or should I say give them to hubby to plant as he is in charge of the vegie patch.

14 August 2013

Mini Embroidery Hoop Necklaces

I was so excited to finally find some amazing miniature embroidery hoops on Etsy and ordered 10 immediately......
...they are from Sonia at dandelyne who is so delightful to deal with and genuinely enthusiastic about her fantastic product and what her customers are creating with her hoops.
 
So here is the new range of Cupcake Cutie necklaces...
 
Mushrooms in blue and...

....Mushrooms in green.

Mr Fox
 
Ms Bunny

Babushka Mushroom
 
Babushka Hedghog
 
 
All the designs are teeny tiny cross stitches onto felt and have a 20" necklace chain...

....with a lovely back to finish them off...

 
You can find all the Mini Embroidery Hoop Necklaces in my felt or Etsy stores.
 
P.S Available as a brooch too!