Pages

27 February 2012

Sew your own Felt Cupcake!

These cupcakes are so easy to make and are great for pretend food for kids or as mini pincusions!

Good enough to eat!
This is a great project for beginners and young sewers. You will need:

Felt scraps
Embroidery floss
Needle
Cupcake cases
Stuffing


For these to work you need to choose a sturdy cupcake case, one made of light car. In the photo I have used Paper Eskimo ones which I purchased at Stevens or they would be available online.


Lets get started....


Sit your case on your chosen cloloured felt - here I am making a vanilla cupcake!
Basically draw a larger circle around your case adding about and an inch (3cm) all round.
Don't worry about making a perfect circle!


Cut out some decorations for the top. Here I am making a flower.
Using a couple of strands of floss I have whip stitched the centre to the petals.

Then I have whip stitched the flower onto the middle of the circle.
Flip your flat cupcake over and using 3 strands of floss use a running stitch all around the edge gather it together leaving an opening about an inch (3cm wide). Be sure to knot your floss off while it is still gathered.

Stuff with polyfill or cotton balls.
Cut a circle of felt slightly smaller then the base of your cupcake case. As you can see it doesn't have to be perfectly round!
Use whip stitch or blanket stitch to stitch the base on.

Flip it over and this is what the top looks like.

Just squish the cupcake into the case and you are done! Don't worry about glueing or securing it in. That way you can swap the cases and cupcakes around.

Have fun making different toppings, I have made sprinkles & cherries in the top photo.

19 February 2012

Mushroom Felt Needlebook: free pattern + tutorial

Hand stitch your own mushroom needlebook!

I thought it was time for another tutorial so here goes...

Click here to find the pattern. Print it on an A4 sheet of paper, cut out pieces and trace onto card to make the pieces easier to use.

You will need:
Green, pink, red & white felt.
Green, pink, red & white embroidery floss.
Sharp scissors
Pinking shears
Pins
Embroidery needle
Fading fabric marker

Step 1

Step 1:

Cut 2 x outside in green felt with scissors.
Cut 1 x inside in pink felt with pinking shears.
Cut 1 x outside square in pink felt with pinking shears.
Cut 1 x mushroom top in red felt.
Cut 1 x mushroom stem in white felt.
Cut 1 x grass in green felt.
Cut 4 x circles in white felt - random sizes!
Step 2

Step 2:
Lay the pink inside piece on top of one of the green outside pieces and using your fading fabric pen mark the middle then pin either side of the centre.
Step 3

Step 3:
Using 3 strands of embroidery floss use a running stitch to attach the two together
Step 4
Step 4:
Using 2 strands of white floss whip stitch the dots onto the mushroom top ina random fashion!
Step 5:
Step 5:
Lay out the mushroom pieces onto the front square and pin down the white stem only.


Step 6:

Step 6:
Using 2 strands of white floss whip stitch the stem in place.
Step 7

Step 7:
Using 2 strands of respective matching floss whip stitch the remaining elements into place.
Step 8
Step 8:
Take the other outside green piece and fold in half. Position the pink front piece int the centre and pin into place.
Step 9
Step 9:
Using 3 strands of green floss use a running stitch to attach the pink felt to the green felt.

Step 10
Step 10:
Take the two completed green outside pieces and place them wrong side together.


Step 11


Step 11:
Using 3 strands of pink floss blanket stitch the back and front together.

Step 12
Step 12:
On the inside position the 2 pieces of the dome and stitch into place ensuring to only stitch through one layer of felt!


Close the dome and stick a needle in and you are done!
No more stray needles down the side of your couch anymore.

13 February 2012

Turn an old tapestry into a pincushion!

So I know I am supposed to be sticking to one craft project and one craft project only (refer here to find out more) but I got a little side tracked with this...

Tapestry pincushion

We are moving house at Easter so the packing has begun, although it is slow progress with a toddler who unpacks as we pack. So I am sorting through my craft stuff and realising the true extent of my unfinished projects!
I have always loved to stitch and have loads of completed tapestries of my own designs just sitting in a box. I have nearly thrown them out in the last two moves but always thought I might come up with a great idea for them.

Unfortunately I always stitch on the smallest piece of canvas I can find (!) which leaves no room for framing so what to do with them?

I thought I would turn one of the little ones into a pincushion so here is what I did....

This is what I started with
I trimmed the canvas close to the edge of the stitching but ensuring not to cut into the square of the stitches. I cut a piece of green felt to the same size as the tapestry...


Then using 6 strands of black embroidery floss (DMC 310!) I started to blanket stitch the two together. I am a huge fan of blanket stitch and find it quite addictive (is that a bit sad?) but it is a stitch that takes a bit of practice. Check out my stitch guide for how I do it!


Its a little hard to see but I am stitching over the black wool stitching already there with the felt attaching at the back. This is what it looks like from the felt side...


Then I stitched all the way around. I was a bit worried the white canvas showing through might not look so flash but it is hardly noticeable and with the black stitching it almost has a lace effect.

I left one of the short sides open and then stuffed with polyfill - not too tighty as I wanted to be able to see the face clearly.


Then I stitched it up! It didn't take that long actually and I am quite pleased with the end result...


This is the view from the top...


Now what to do with the other thirty old tapestries...hmmmmm.stay tuned!

Project Update: Short & Sweet

Just to remind you this is last weeks progress photo.....


...and this week, well....


.....not much difference really and that could possibly be that I started a new project (oops!).
Well technically finished an old one so its not really cheating.

Check out my next post to find out more.

10 February 2012

Stitching envy

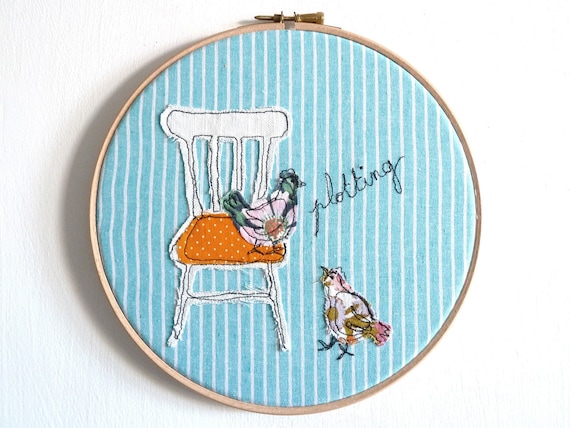
I am such a huge fan of the stitching work of Annabelle from Three Red Apples. I have serious stitching envy!

Embroidery Hoop Art - 'I love my bed' Textile Illustration in PurpleEmbroidery Hoop Art - 'Gypsies at heart' in Turquoise & Purple

I love her Embroidery Hoop Art - just gorgeous!
A very clever combination of vintage and new fabric, applique and freehand machine embroidery.

Embroidery Hoop Art -'Plotting chickens' Whimsical Textile Illustration in turquoise & orange - 8" hoop
This is my favourite hoop which you can find in Annabelle's Etsy store

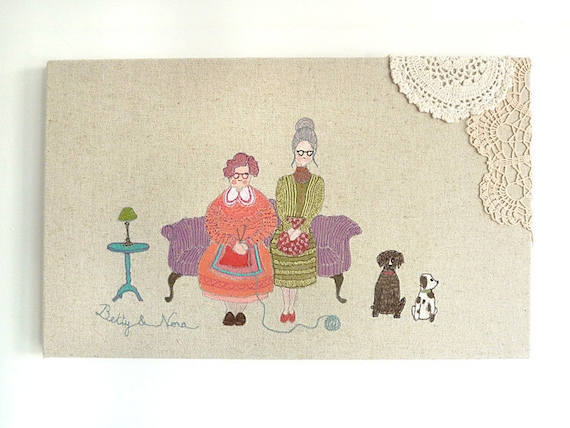
Check out the Three Red Apples website for hoops, cushions, canvases & quilts - I want them all!


Embroidery Original Art Canvas - 'Betty & Nora' Figurative Textile Artwork. Purple, orange, turquoise, olive
I am loving her new design 'Betty & Nora' - too cute.
Be sure to follow the Three Red Apples blog and then you can get a sneak peak of all the fabulous new designs.

Oh to be so talented......sigh!

06 February 2012

Project Update: Week Three

Here is the progress on my new Babushka Sampler pattern...

Not moving along as fast as I had hoped.

I must confess I nearly started another project...a Dolly Dingle pincushion.

But no I restrained myself and thought I should be writing lines...

I must not start another project without fininshing one first.

Still on target to be finished by Easter.