Pages

16 September 2014

Felt watermelon brooch tutorial

It is nearly Christmas Market time again and I am starting to think about what I am going to make this year. I thought I would start with this cute watermelon brooch and I promised my Instagram friends that I would share the tutorial and look here it is!


Apologies for the bad photos which I have tried to mask with pretty borders (he he)

You will need:

  • The pattern which you can download for free HERE
  • Dark Green, White, Red + Black felt
  • Embroidery floss colours to match the felt
  • Brooch backs
  • Pins and scissors + stuff
Cut out the felt as shown on the pattern.

Rightyho lets get started...I find it is just as easy to make a few at a time.

Lay out the watermelon seeds on the red felt as shown and whip stitch 
on using 1 strand of black floss.

Fold the green circle in half and pin at the bottom.Lay white piece on lining up the 
straight edge with the fold of the green and pin in place through the top layer of green only...

....and when you open the green circle out it should look like this...

...now whip stitch the white piece on using 1 strand of white floss.


Now add the red piece and line up the straight edge on the white.
Then whip stitch around the red piece using 1 strand of red floss...

...so it will look like this...

Next fold the green circle in half again and pin...
...and then either whip stitch or blanket stitch (as I have done) the two 
round edges together with 1 strand of matching green floss...

....and you are nearly done...

...flip it over and sew on the brooch back nice and firmly with green floss...

..and then I like to use my business cards as packaging...

And so there you go a cute wee watermelon brooch. Go forth and make many!!

P.S If you decide to share this tutorial can you please have a link back to my page (pretty please)

03 July 2014

Don't fall over its a tutorial!: Felt Currant Buns

OMG it has been forever since I posted a tutorial and one of my facebook fans requested one for these scrumptious buns!


I whipped up 5 of these buns for my daughter's pre-school to use when they sing the '5 Currant Bun' song.
They absolutely loved them and are keeping them especially to use for mat time. It is so nice to be able to make something that is useful and appreciated.

Anyway what follows is a basic tutorial so you can whip up your own. Apologies for the mediocre photos, it was either a quick tutorial or nothing at all!

You will need:

Thin card
3 x pieces of A4 brown felt
1 x piece of white felt
Scraps of red felt
Scraps of dark brown felt
Sharp scissors
Brown, red and white embroidery thread
Sharp needle.

START by printing out the pattern pieces which you can find HERE.

GLUE the print out onto light card and then CUT out the pieces.

TRACE around the pattern pieces onto the felt and cut out.


These are the 4 pieces you will need to make a bun.
Currants come later.


Take the large brown circle and using 2 strands of brown thread use a running stitch around the outer edge, gathering as you go.


You will end up with this. Don't knot the end just yet.


Add heaps of stuffing while holding the gathering in place.
When quite firmly stuffed knot off your thread. Then keep adding stuffing in until it is nice and firm.


Take the small brown circle, lay it over the stuffing opening and pin in place. Use 2 x strands of brown floss and either use whip or blanket stitch to attach it.


Then it looks like this.


Flip it over and you have nice round firm buns!!!


Time to start on the cherry. Gather the red circle using 1 x strand of red floss in the same way as you did the bun.


Add a little stuffing and pull the gathering tight as you add a little more stuffing. A toothpick is quite handy for this part.


Pull it tight and do lots of stitches to secure it in place, leaving the thread still attached


Now grab a bun, place an icing piece on then position your cherry on top. Once you are happy with placement take your thread down through the icing and into the bun and back up again to catch the bottom of the cherry. Do this a few times and then...


...knot your thread under the icing. This just helps the cherry stay firmly attached especially if little hands are going to be tugging on it.

Next pin the icing down and attach it to bun using 1 x strand of white floss and whip or blanket stitch. (sorry missed a photo of this!)

Now cut out lots of currant shapes out of dark brown felt. I used about 10 currants per bun. Pin them on in a random fashion and then stitch them in place with 1 x strand of  dark brown floss and either whip or blanket stitch.


And then you are done!!!


Your kids will have hours of fun playing tea party with these and you could also bring them out at Christmas for decoration as they look like little Xmas puddings.

Check out my other great pretend food tutorials HERE.

10 June 2014

A deer catastrophe

I have just had an SOS call from one of my customers which began with..."There's been a tragic accident at our house today..."


Basically it is puppy vs. deer head and I think the puppy won. Poor old deer is battered and bruised but mainly in one piece so my customer is sending him back to me to recuperate at the deer hospital where I will tend to his wounds.


27 May 2014

Taking orders again..

Still so busy with my faux taxidermy which I am loving. I have had such a wonderful response on instagram and facebook about my creations so thank you!

I can finally take orders for the mini deer and giraffe hoops.....

...available in my etsy store.

I promise I am going to get back to the dolls house makeover and other interesting craft projects soon!

07 May 2014

Deer trophy head auction with $1 reserve

For all the New Zealand followers I have one of my deer heads up for auction on Trade Me with a $1 reserve...

Here is the link.

Happy bidding!

xxx

16 April 2014

Where to put your faux taxidermy...

I have decided to install one of my deer heads in my kitchen....


I think it matches the kids cups, drink bottles and toy cars nicely!

13 April 2014

New Faux taxidermy deer heads now in store

So I have been very busy with my faux taxidermy lately. Trying really hard to keep up with orders while still keeping the family happy.

Anyway I finally have 3 new designs in my Etsy store....


They are available in 3 sizes as shown, with and without antlers.

Now I can't wait to get started on the Fox and Giraffe designs!

06 April 2014

GIVEAWAY TIME!!!

I am giving away this gorgeous Fox Girl on my facebook page...

So head on over there to enter if you would like to win.

23 March 2014

Faux Taxidermy: Felt Deer Head

My love of faux taxidermy continues with this wall size version of the deer....


I have a few orders already so I think he is going to be popular. I will try and get one in my Etsy store soon once I get on top of things which lets face it with a 2 year old and a 3 year old happens like never!!!

16 March 2014

Trying my hand at felt taxidermy

Having so much fun experimenting with Felt Taxidermy (or Feltidermy)....

....this is a teeny tiny deer head that I have made into a brooch.

I can't wait to get started on a wall size one!

01 March 2014

Dolls House Makeover: The 'Yellow Room' revealed

So here it is the first room of the Dolls House makeover is ready to make its debut. I won't bother with any words because I am sure you just want to see photos......ENJOY!


I think my fav is the micro macrame closely followed by the tiny faux taxidermy. I promise to write up a tutorial for the macrame, the washi tape curtains and share the pattern for the rug. The taxidermy however is a one off I don't think I will be repeating....it was definitely a labour of love.

Hope you are feeling inspired now to dust off your own dolls houses and start decorating.

I would love you to share photos of your dolls house makeovers on my FB page....CupcakeCutieNZ

I think the 'Cloud Room' is the next room to be revealed so stay tuned.

28 February 2014

I can't stop making cute felt softies!!!

I have been busy stitching lots of gorgeous softies......


These two adorable woodland creatures are patterns from Noia Land whose patterns I just love to make.


And this fabulous fellow (pattern from Gingermelon) has an alter ego...

...too cute.

They all  destined for a very special project to be revealed soon

20 February 2014

Meet Deer Girl

Just a quick post to show you this gorgeous girl who I have just finished making....


Deer Girl is a Noia Land pattern and I found her here at my favourite shop Kitschy Digitals.

Isn't she devine! She even has poseable arms and legs...so cute.

14 February 2014

#dolls house makeover: miniature felt cloud rug {free pattern}

Everyone needs a cloud rug for their dolls house and this one is adorable and easy to make.


You will need:

Light blue felt (or colour of your choice)
White felt
Black felt
Pink felt
Assorted embroidery floss colours
Scissors + needle
Template which you can DOWNLOAD HERE


Gather all your bits and pieces together and cut out all your felt as per instructions on the TEMPLATE.

ONE:
Position the eyes and cheeks on the biggest cloud to get an idea of where they sit. Refer the template for layout.

TWO:
Using 1 strand of black embroidery floss whip stitch the eyes on. With the same thread add the eyelashes, eyebrows and mouth using back stitch.

THREE:
Using 2 strands of pink embroidery floss secure the cheeks on with 1 cross stitch in each.
Using 2 strands of white embroidery floss add the flecks in the eyes.

FOUR:
Pin the cloud onto one of the blue pieces, refer to template for positioning,
Five:
Using 1 strand of white embroidery floss whip stitch the clouds on.

NB: At this point I decided to give my rug rounded corners.

FINALLY:
Using 2 strands of blue embroidery thread place the two blue pieces together and blanket (or whip) stitch around the whole rug.

********************************************************************
MINI CLOUD CUSHION
You can also make the cloud into a mini cushion for your dolls house. Just cut out two of the larger cloud pieces, sew on the face details as above then blanket (or whip) stitch the two pieces together. Remember to leave a gap to for stuffing and then sew closed.


CLOUD BROOCH
Repeat as per the cushion and sew a brooch back on the back.

I would love to see photos of your felt cloud creations using my pattern.
Please feel free to upload them to my facebook page....https://www.facebook.com/CupcakeCutieNZ

Happy Sewing!

04 February 2014

Scrabble tiles cross stitch anyone?

My two wee kiddies were back at daycare today after a long 6 week summer break so I got busy designing these scrabble cross stitch patterns which have been in the back of my mind for ages.

As Valentines Day is just around the corner I started with this one....


....this would be super cute stitched up and framed in an embroidery hoop. Find it here.

And this is the design that has been kicking around in my head for ages.....stitching the kids names in scrabble tiles...
....I thought it would be fantastic stitched really large onto pegboard or something similar. Maybe when I have finished the dolls house makeover I will get started on it.

Of course not everyone has kids called Oliver and Gemma so I have custom scrabble tile cross stitch pattern available...
....you just let me know 2 names or words (which share a common letter) that you would like and I will make it into a cross stitch pattern for you. More details on the listing. I have also made a custom listing for 3 names too.

Now back to the dolls house!


02 February 2014

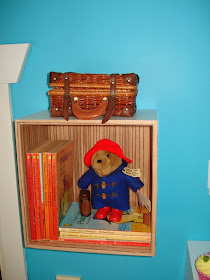
kid's bedroom makeover

I realised I forgot to share the kids room makeover photos with you.

I don't think I need any words, I'm pretty sure you just want to see the pictures...


Hope this has inspired you to add some colour to your child's bedroom!